
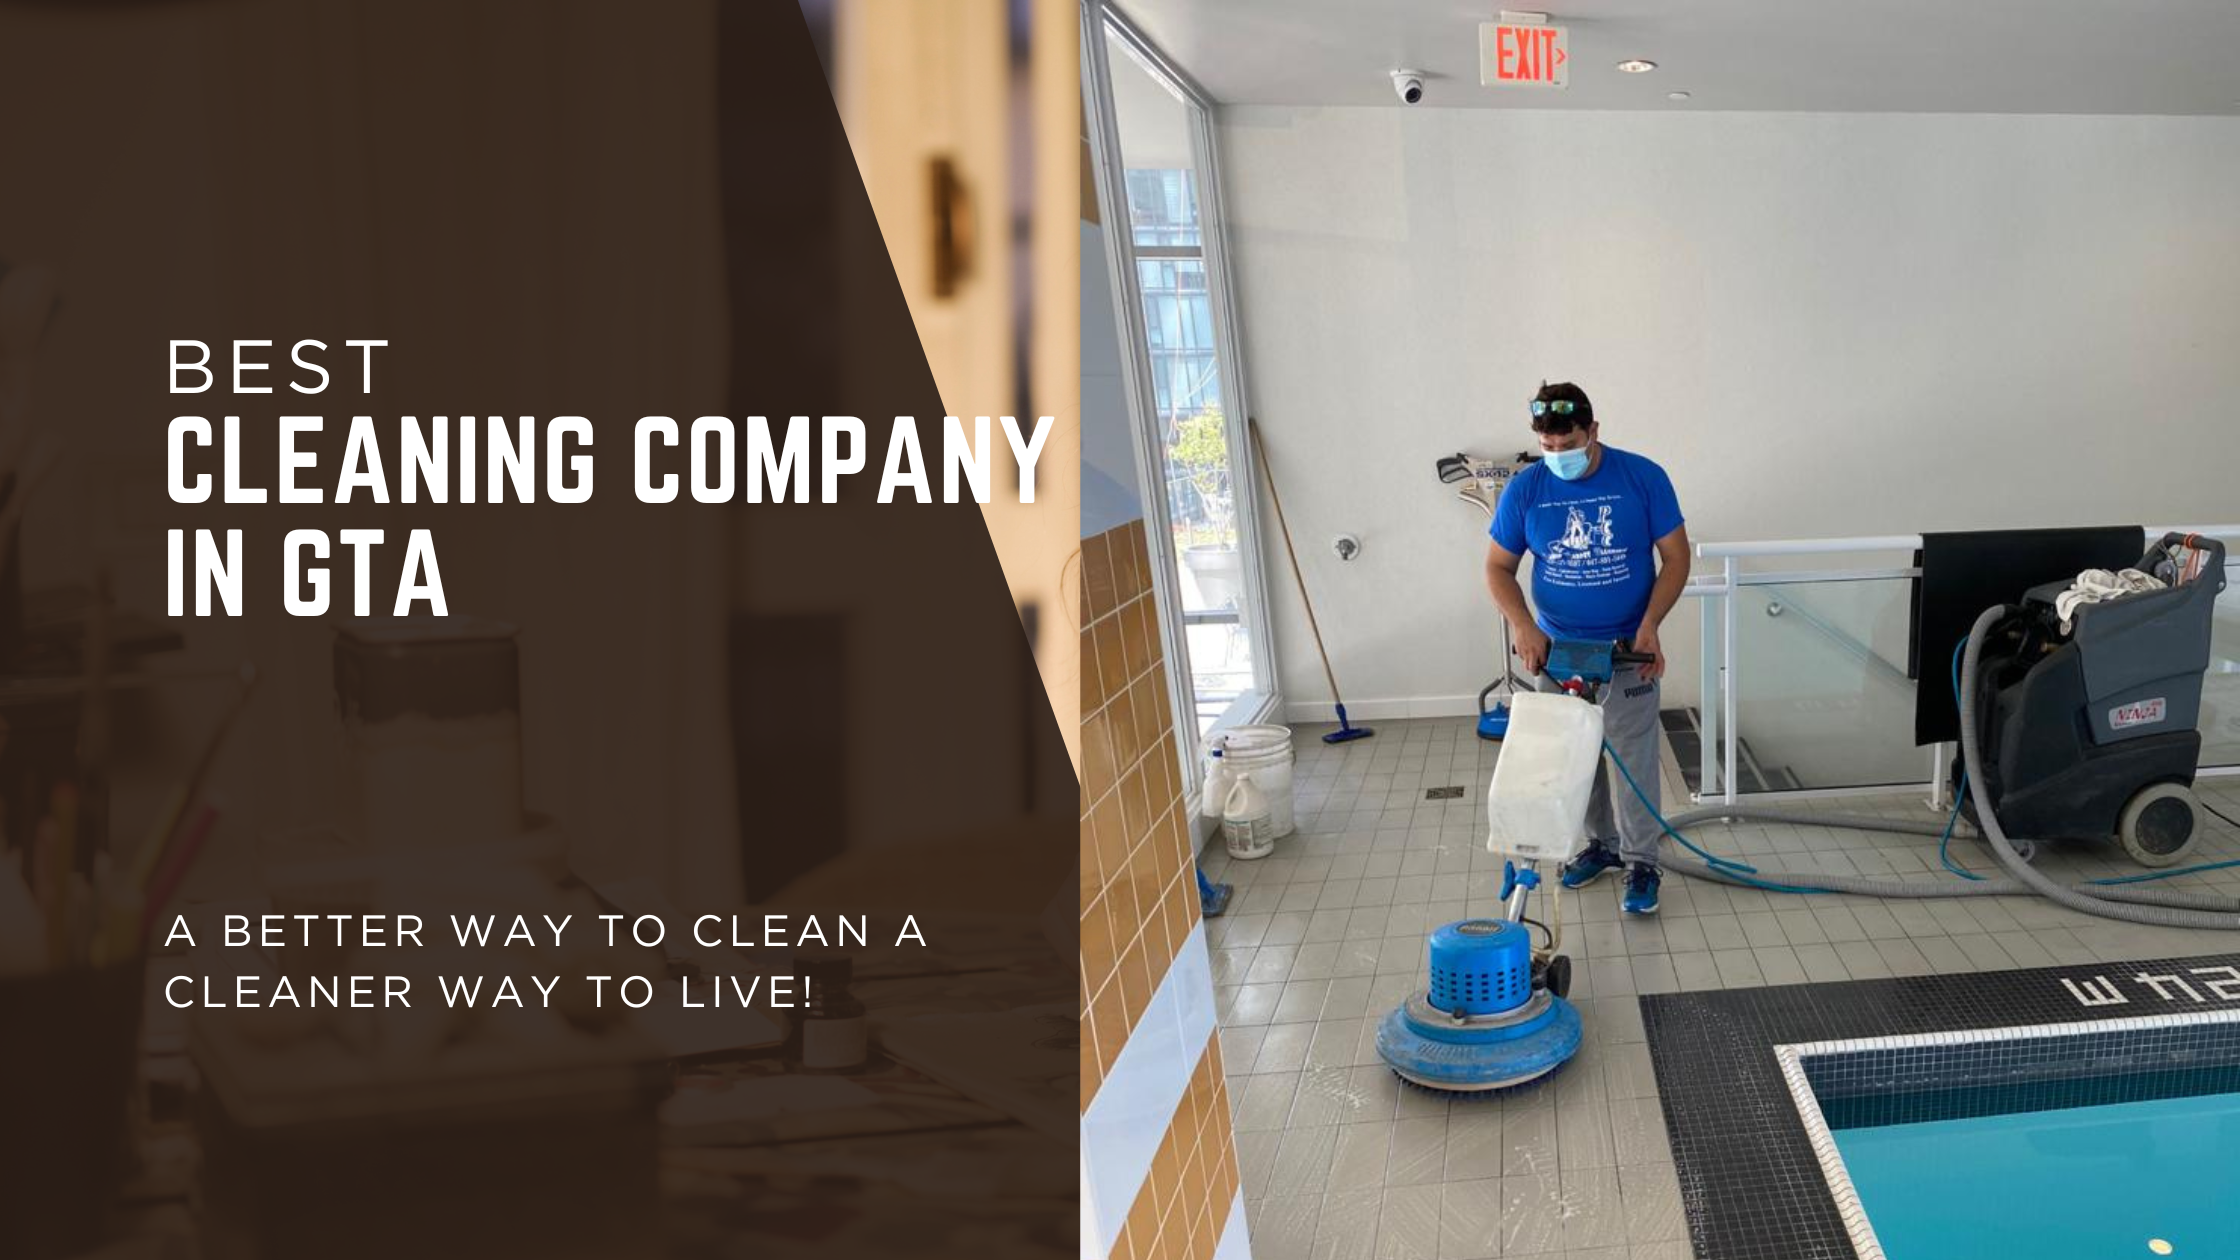
Office Opened
Mon-Sun Day: 7 am to 11 pm

Service Area:
Toronto, Etobicoke, Scarborough, Pickering, Vaughan, Richmond Hill, Mississauga, Markham
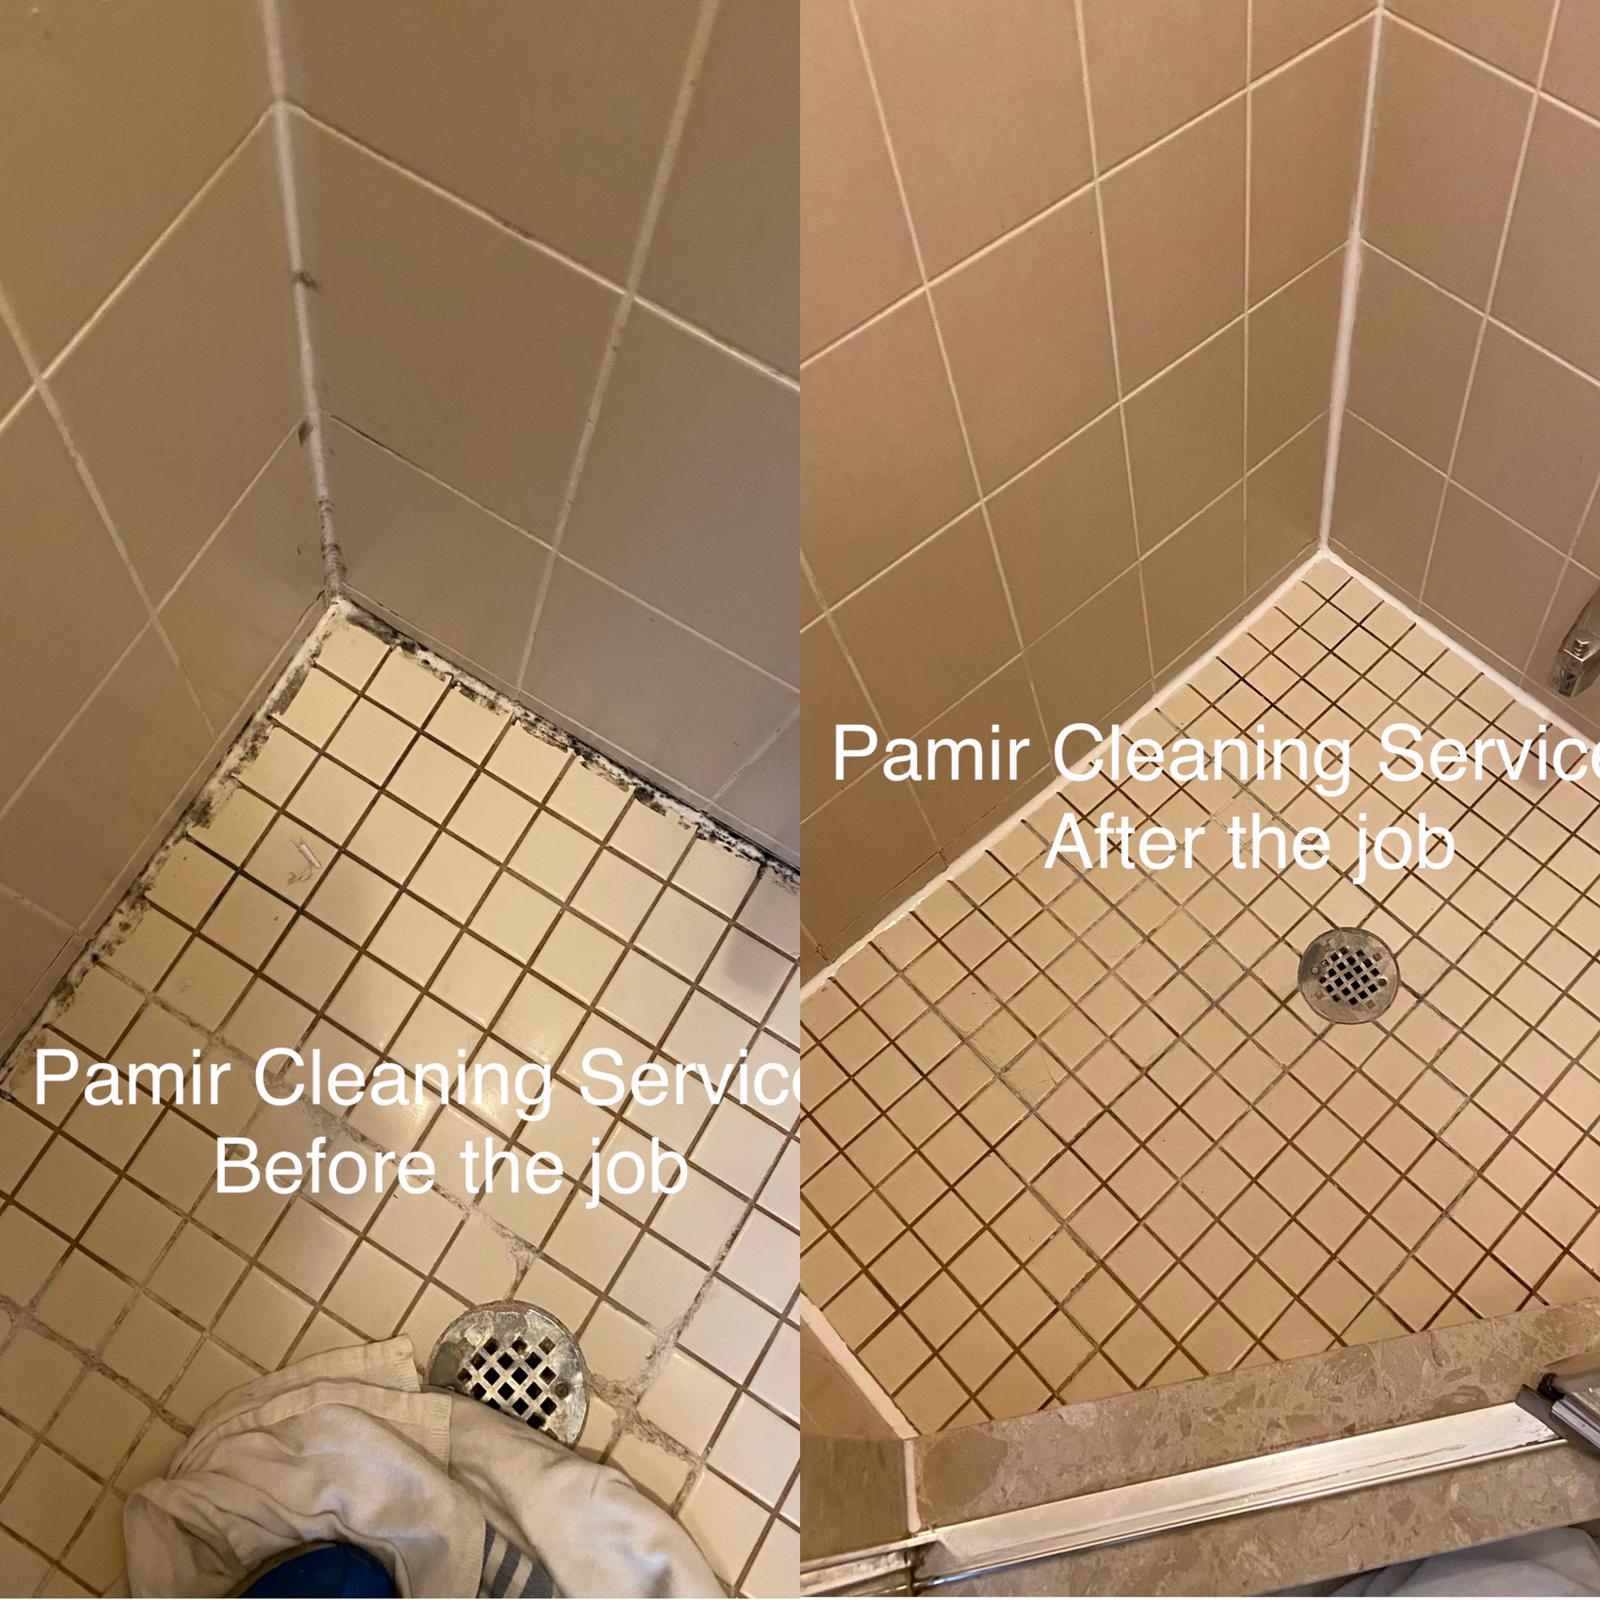

Stall Cleaning & Caulking. Here you will get tips to apply shower tub/stall cleaning & caulking
Caulking a shower slow down requires similar essential strategies as utilized for some other washroom areas, however, it is much more significant here than for different zones. Extraordinary caulk employment can last as long as five years, however, check the shower dividers yearly to get issues before they can get genuine.
Indications of caulk turning sour include: caulk pulling endlessly from the base of the shower, form development, flaky appearance, pieces of caulk missing from joints, and dampness development along the joints. With tiled showers, relaxing tiles can be an indication that water is invading behind the divider. If you spy any of these manifestations, it’s an ideal opportunity to re-caulk.
Picking the correct caulk for your venture is an imperative initial step. There are two kinds of caulk that home improvement stores offer—latex and silicon-based. It is enthusiastically suggested that you utilize a 100% silicone-based caulk for any application where water and dampness are common, for example, latrines, showers, and sinks. (For different undertakings, for example, fixing drafts around windows and entryways, latex caulk is a decent decision.) Stall Cleaning & Caulking
Figure out how to re-caulk your tub and give it a new seal in 4 simple advances.

Start by shutting the fly down the channel in the tub and covering the whole tub with a drop material to shield it from scratches, buildup, and so on
Take the disposable cutter and cautiously pry the old caulking off the tub. Keep the point of the edge as low as could be expected under the circumstances and watch the caulking to check whether it’s being cut. On the off chance that any of the caulking is left over on the tub, the new caulking won’t stick.
When all caulk is taken off, utilize a material or wipe and a family cleaner to clean the surfaces. Altogether wash away the cleaner utilizing a moist cloth, at that point let the surfaces dry before applying the new caulk.
A dry, nonabrasive cushion scours away every hint of caulk buildup. (Tidy up after silicone with a cushion absorbed mineral spirits. Yet, to try not to scratch plastic installations, utilize a delicate cloth hosed with mineral spirits, not a scouring cushion.)
Wipe a moist cotton cloth over the joint to eliminate the caulk clean and set up the surface for the new caulk. Completely dry the territory with paper towels, a dry cloth, or a hairdryer.

Tape off the wall – Shower Tub and Stall Cleaning & Caulking
Lay equal portions of blue painter’s tape, about 3⁄8 inch separated, to keep the globe straight, uniform, and of surfaces where it shouldn’t be.
Point the spout opening toward the joint; hold the firearm equidistant from the surfaces on one or the other side of the joint and around 45 degrees out from it.
At that point apply consistent strain to the trigger as you move the firearm easily along the whole length of the crease. Regardless of whether you push or threaten to use the firearm involves individual preference.
When the creases are filled, hose a build-up free cloth or paper towel and press it into the joint with your finger. Pull it along the joint in one consistent movement to shape the new caulk into a sunken globule.
Promptly eliminate the tape, each strip, in turn, taking consideration not to let it contact any of the new caulk.

At that point return and smooth the dot again to dispose of the little edges left by the tape. Let the caulking dry for 30 minutes before utilizing the shower once more. From that point onward, the caulking will require 24 hours to fix, so don’t contact the caulking up to that point.
In the end,
Regardless of whether your shower is a detached shower unit or a piece of a bath encompassing a slow down consisting of an acrylic shell or fired tile, it is basic to seal the joints around the base and corners of the shower with a decent quality silicone caulk. Shower Tub and Stall Cleaning & Caulking is not a easy process. But we made it easy.
To eliminate any current caulking, use whichever device is the most agreeable that has a level enough cutting edge to get behind the caulking without scratching it. These kinds of scrubbers and sharp edges can be found at home focuses.
This is the best way to learn how to clean and shower tub and caulk. I am grateful for all the information that is shared here. I wasn’t expecting this today, so I am thankful for the details.
thanks for visiting my website